Welcome to WordPress. This is your first post. Edit or delete it, then start writing!
Categories
Welcome to WordPress. This is your first post. Edit or delete it, then start writing!
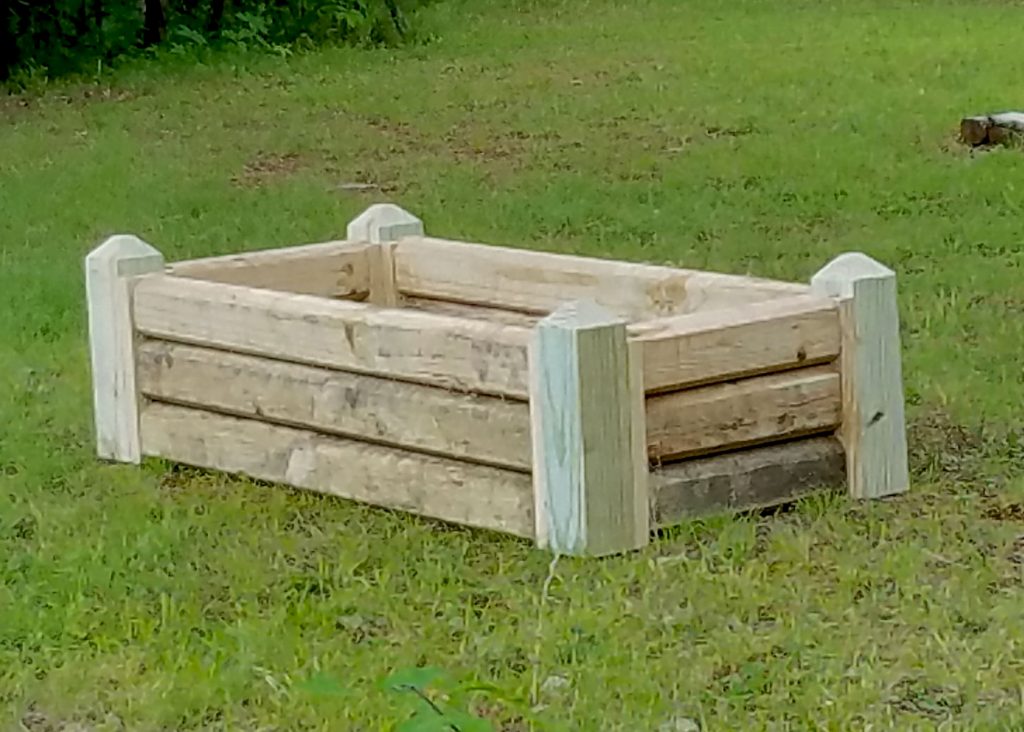
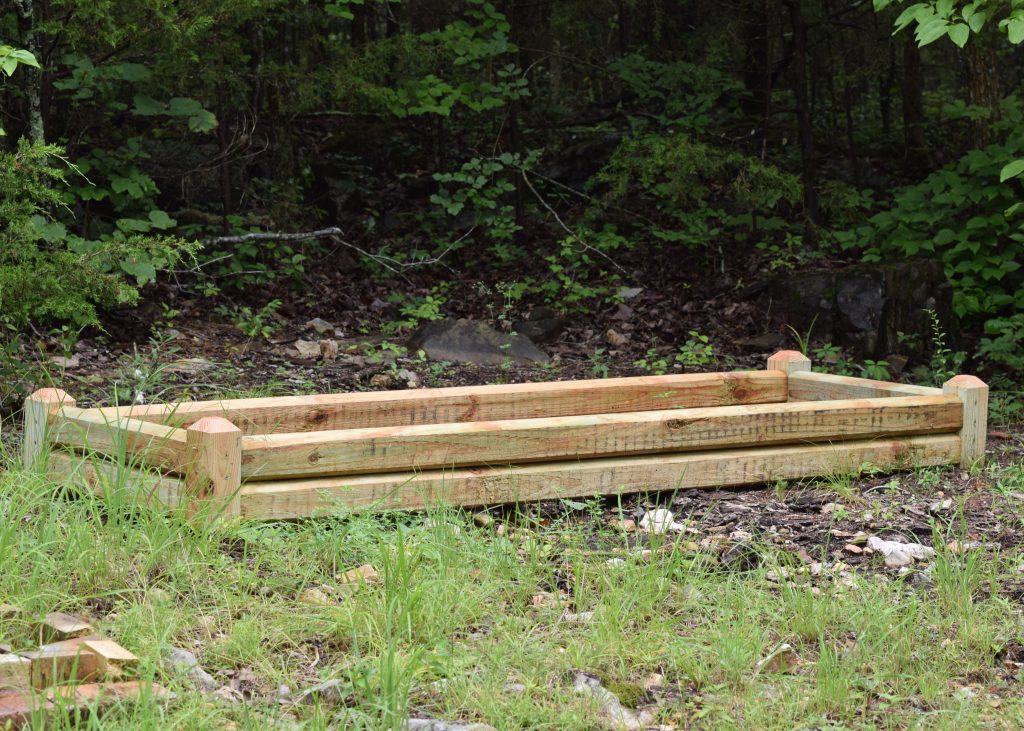
In Arkansas, we grow rocks. Lots of rocks – and that can make gardening a little less pleasurable. Our “Downhill” farm is in a valley, and all the dirt from uphill washes down and collects there, and we have a reasonable amount of topsoil. But our “Middlehill” farm, halfway up the hill, is an entirely different story. The topsoil just won’t stick to the rocks. So we started building raised bed garden boxes. Initially, I wanted substantial boxes that could be assembled without any tools or hardware. This is our first attempt. It’s fairly respectable, and still sits at the entrance to the Downhill farm. It’s roughly 2 feet wide, 4 feet long and 12 inches deep.
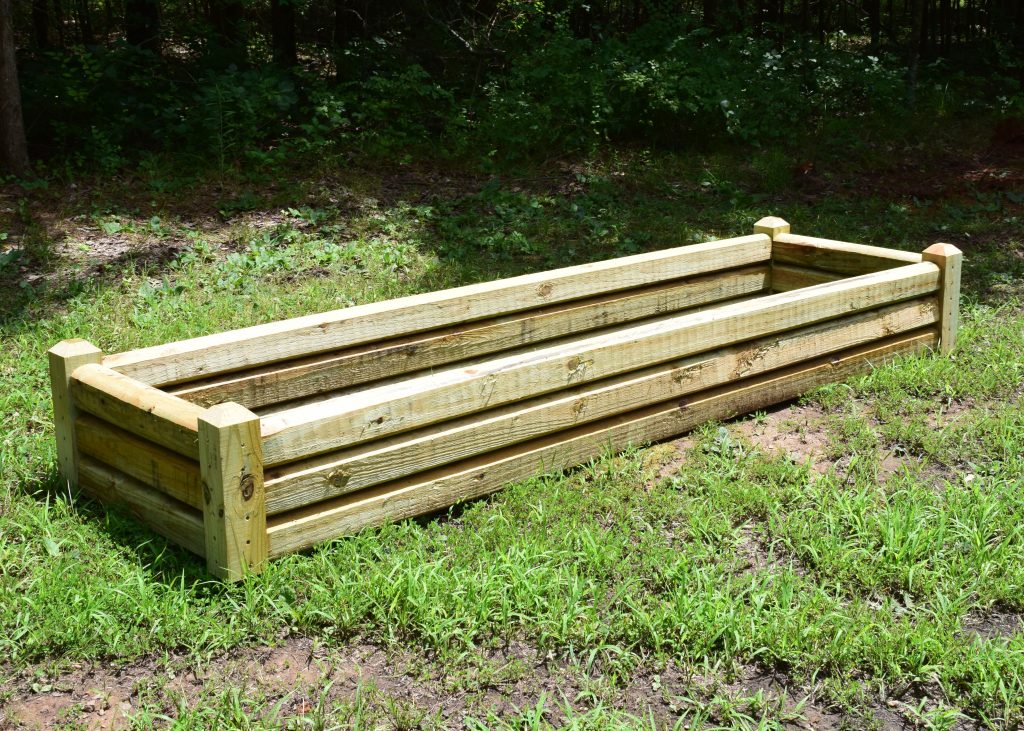
Of course, we both work in manufacturing, and know better than to think that the first design is the best design. So several “Engineering Change Orders” later, we have stepped away from the dove-tailed design, and opted for a version that requires using long screws in the assembly stage. The upside to this is that eliminating the dove-tail also eliminates several steps in the production process, and the new design is much faster to produce.
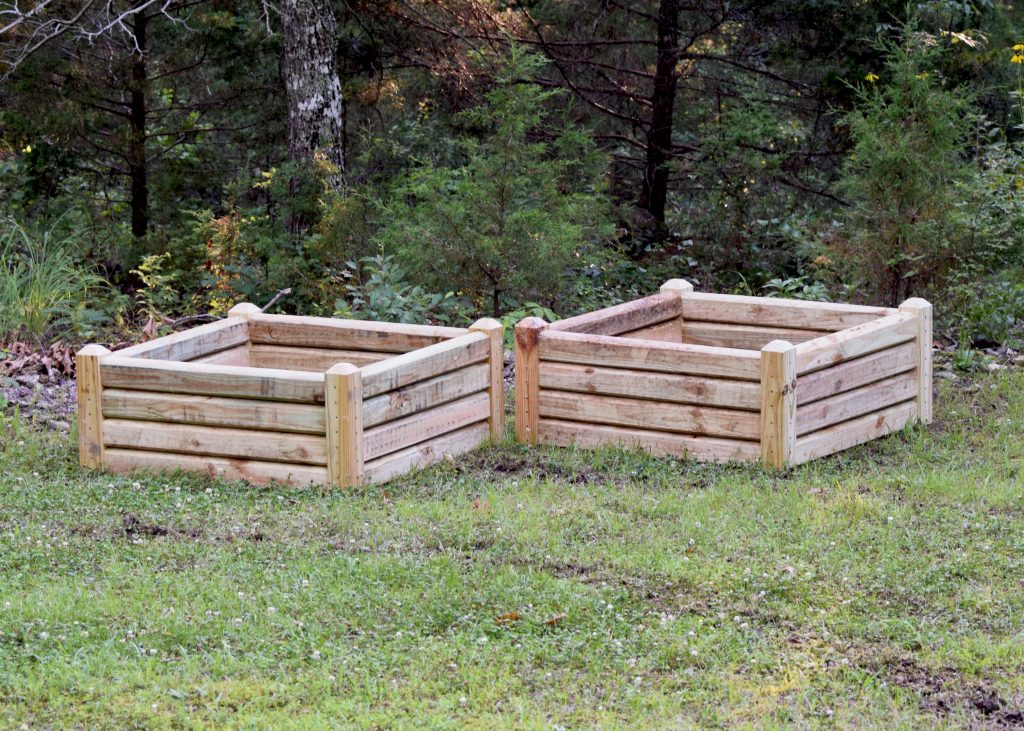
This is our blueberry box version – 3 feet square and 16
inches tall, each designed to hold one highbush blueberry. Eventually we will have a line of these all the way across the back yard to form an edible hedge.
And then we built this version for raspberries.
And, because you can’t take the Texan out, ever, no matter how hard you try, we built a couple of these for Prickly Pear. Because I like Huevos & Nopales for breakfast.
Last Thanksgiving I decorated our table with those cute little pumpkins you find at the markets. Some were ornamental gourds, some were sugar / pie pumpkins, and some were jack-o-lanterns. After all the dishes were washed and leftovers put away, the pumpkins were sent to look pretty on a hay bale in the yard. A couple of months of freezing nights and chilly days later, the pumpkins had collapsed and almost melted into the hay.
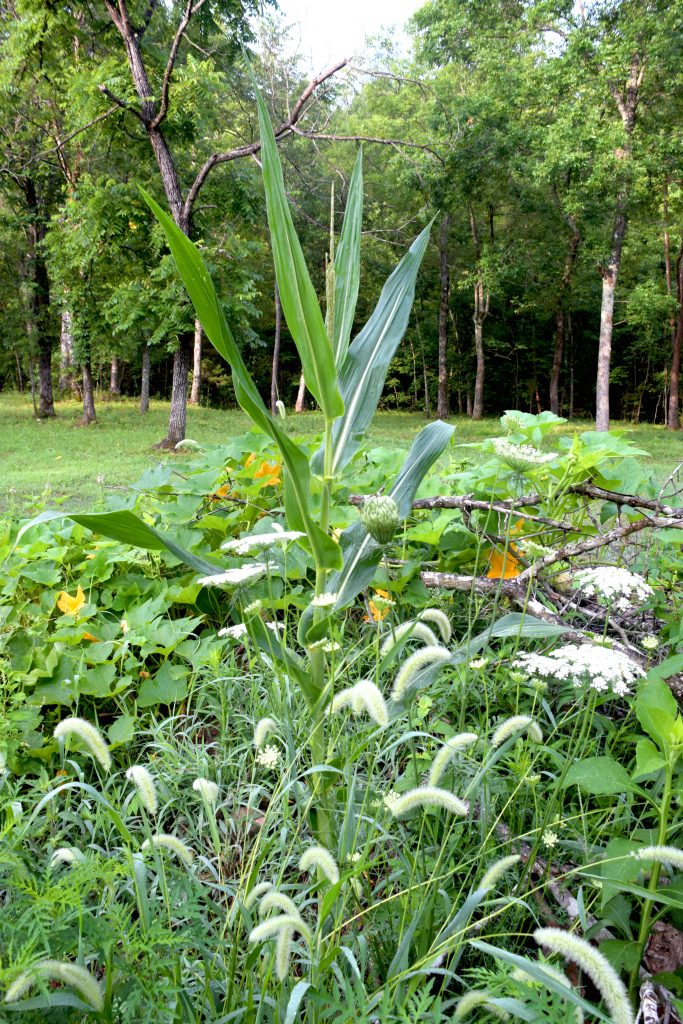
So I scraped them off and threw them on the burn pile. Little did I know what would happen next! Five or six weeks ago, I noticed that our burn pile was full of pumpkin vines. We started a new burn pile to give the pumpkins some space, to see what would happen. But being a confirmed derelict gardener, that was the only help they got. No water, no pruning, no good stuff around the roots. Just allowing nature to take its course.
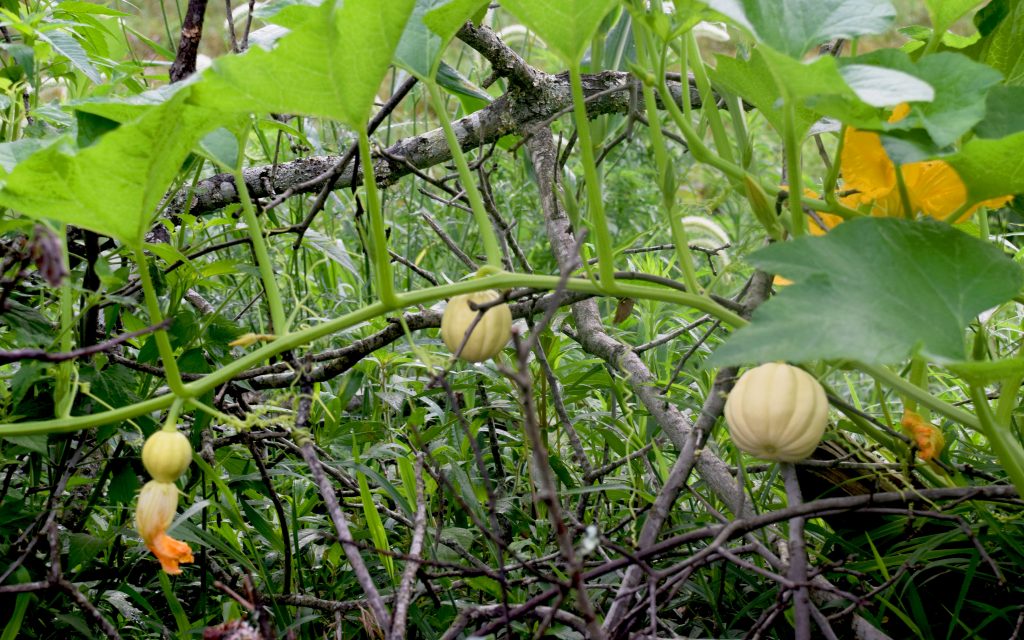
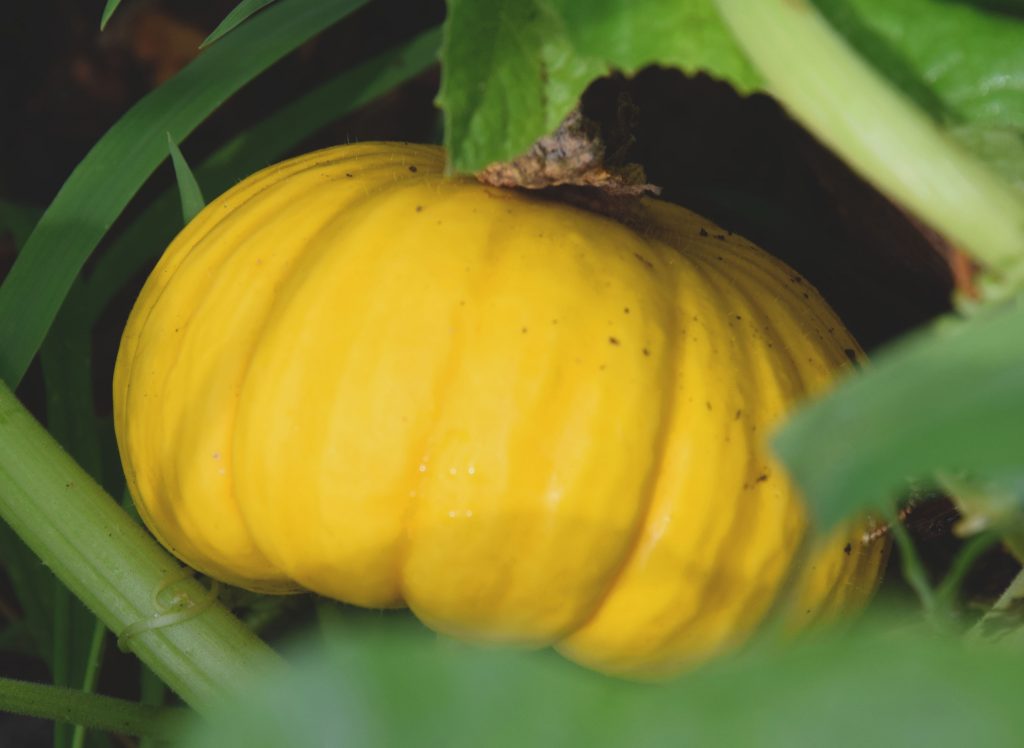
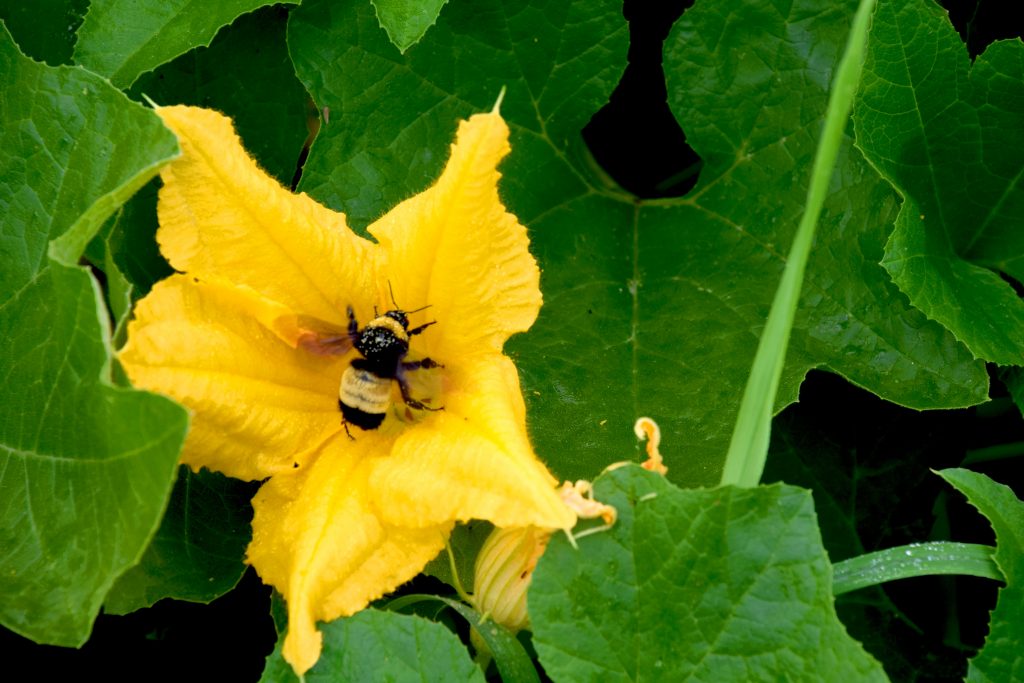
The result was the most prolific home pumpkin patch I have ever had. We’ve already picked them once, and there must still be 50 little pumpkins on the vine, along with dozens of blossoms.
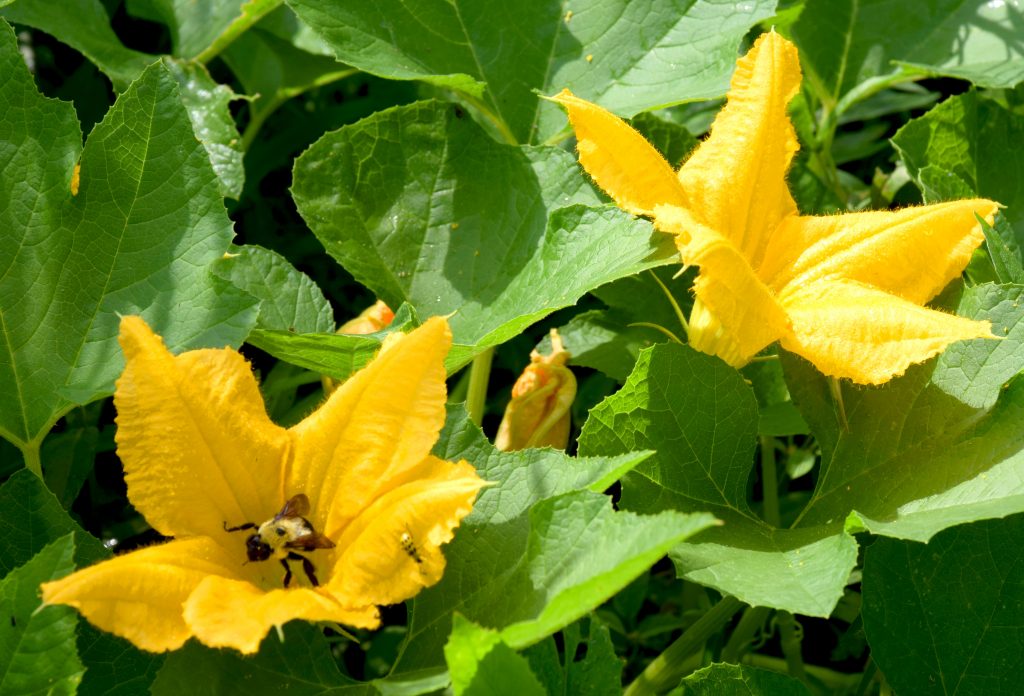
A word of warning: My pumpkin patch is full of buzzy flying things – beetles, a few wasps, and a lot of bumble bees, which I understand are great pollinators. I got out uninjured, but I am sure if aggravated, they can inflict a powerful sting.
Some days I can hear my grandmother’s ghost saying “if it had been a snake it would have bit me.”
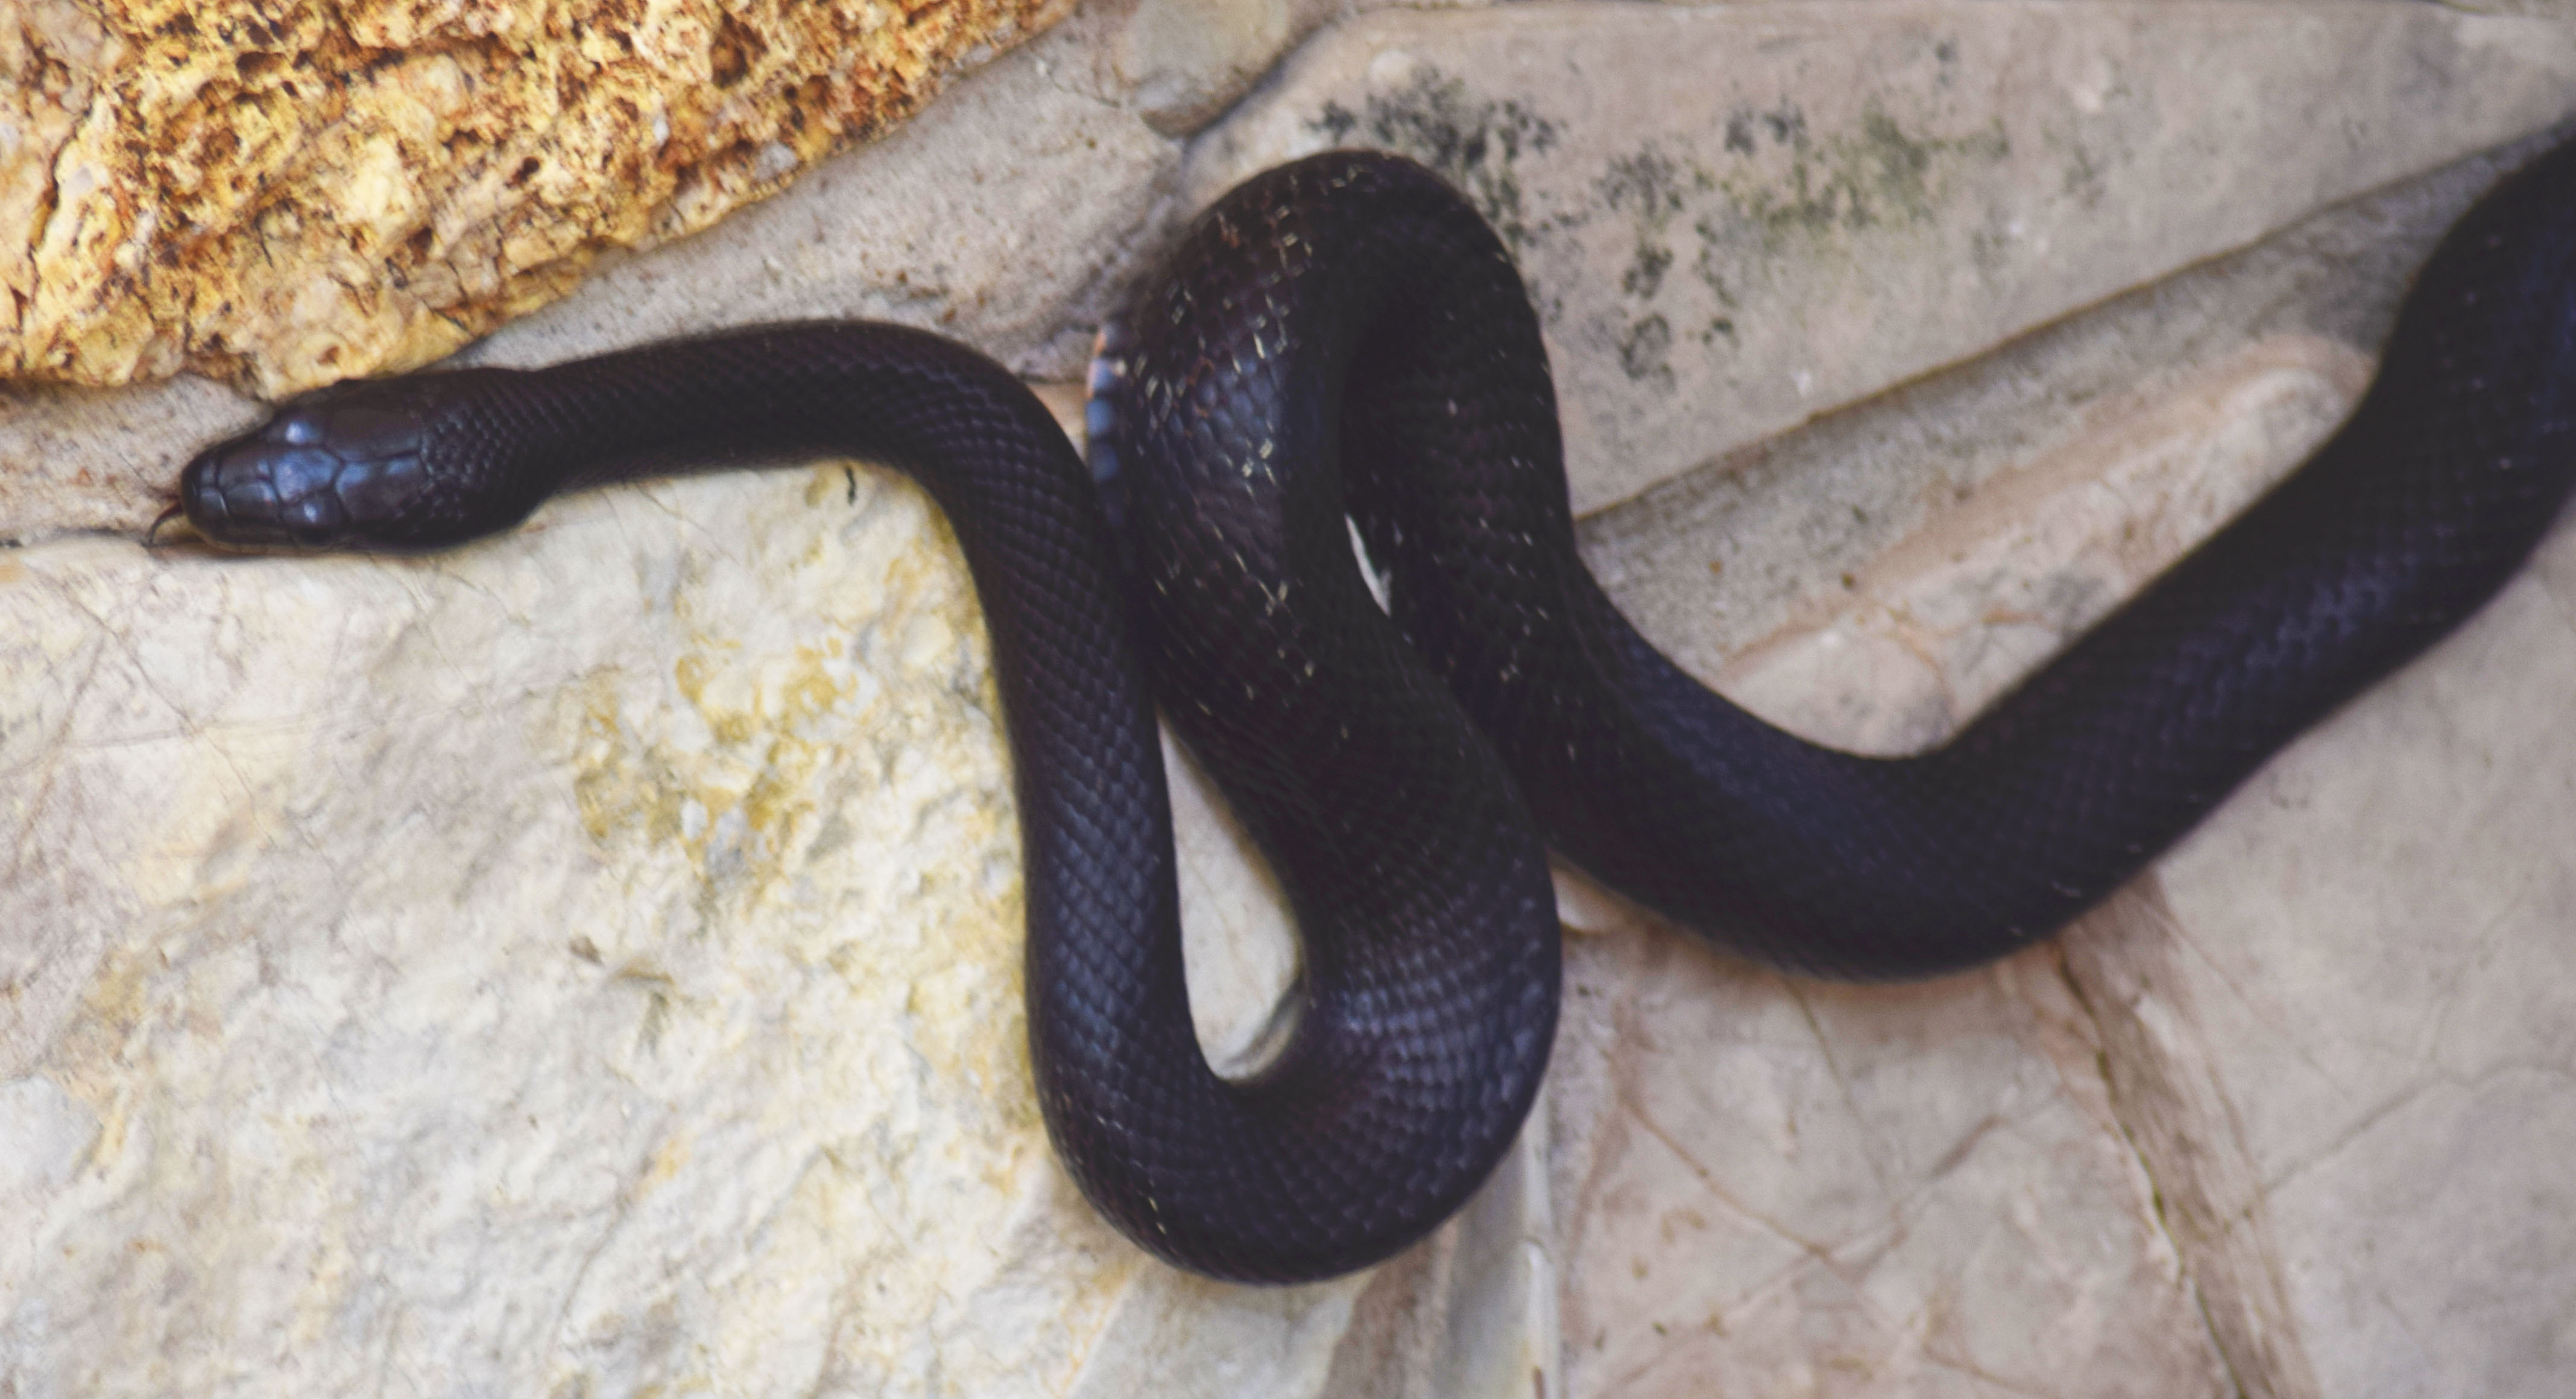
It was a snake. It nearly did! I was about 3 feet away from the front door when I spotted this specimen winding his way through the stones at the front of the house.
Fortunately, I’m pretty sure it’s not poisonous. I’m no herpetologist, but I think this is a plain old black rat snake. It was a pretty good size – 5 or 6 feet long, and not very aggressive. At least not until I started poking it with a stick. But eventually it relented and slithered off into the flower bed to do whatever rat snakes do.
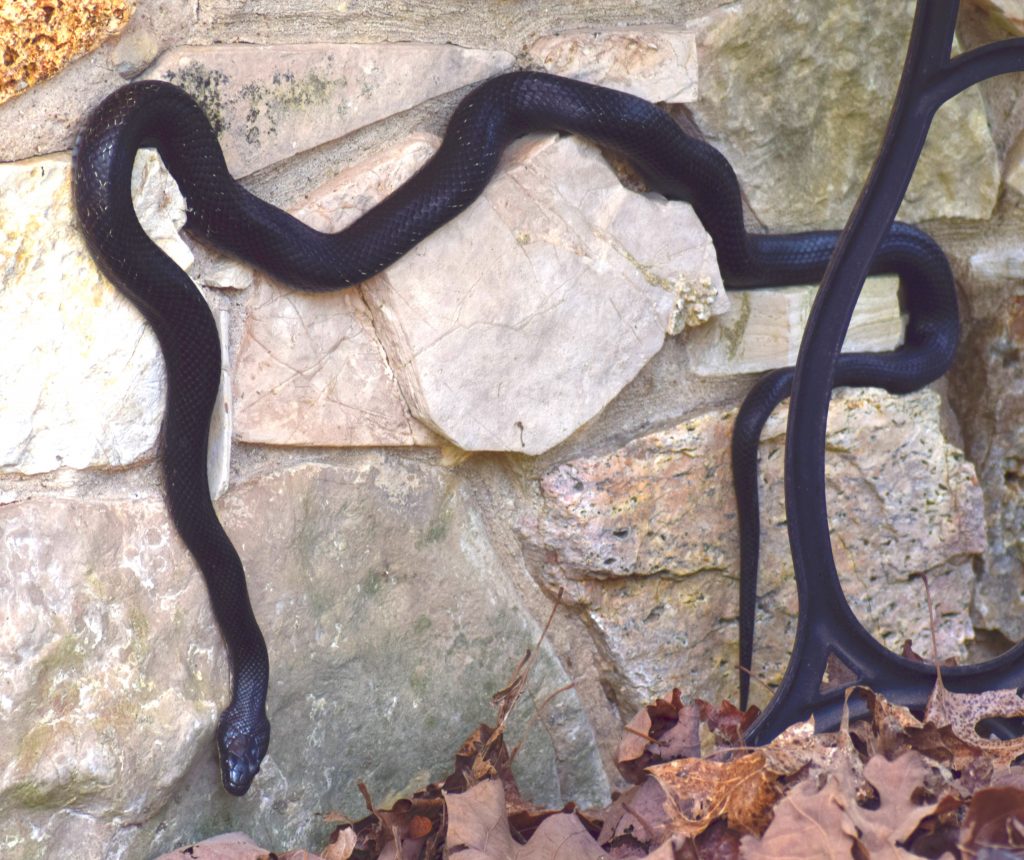
I’m no snake charmer, either. But living in the country, I’ve seen the messes rats can make. Left unchecked, they can be incredibly destructive.
So for the time being, at least, the rat snake stays.
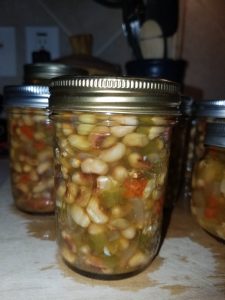
I’ve been in the kitchen again, this time pickling black-eyed peas for a Father’s Day gift.
PICKLED BLACKEYED PEAS
2 lbs freshly shelled blackeyed peas
1 large Vidalia onion (or any sweet onion you like)
5-6 jalapenos (or 2 bell peppers if you don’t like the heat)
1 red or orange bell pepper or 1 pimento pepper (for color)
3 cloves garlic
2 cups apple cider vinegar (MUST BE AT LEAST 5% ACIDITY)
1 cup sugar
4 tablespoons canning salt
1-1/2 teaspoons dry mustard
1/2 teaspoon paprika (I use hot)
1 teaspoon celery seed
1 teaspoon ground black pepper
Processing time: 15 minutes, boiling water bath. Yield: 7 half-pint jars. Headspace: 1/4 inch.
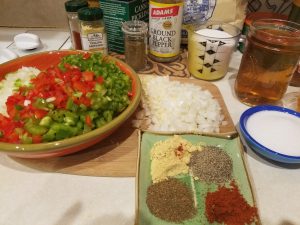
Start by gathering your ingredients and gear.
Canning tip: You can use either white vinegar OR apple cider vinegar in any canning recipe, as long as the label states it is at least 5% acidity.
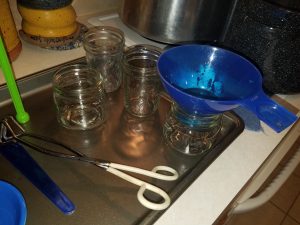
As you can see, my canning gear is pretty basic – nothing fancy here. Not pictured here is the jar lifter – see below.
Soak your fresh peas in some cold water, and skim off the “floaters” before starting.
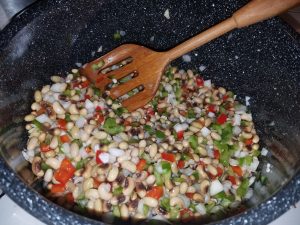
Simmer the rinsed blackeyed peas for 10 minutes in plain water, then rinse them in a colander, and wash the scum out of the pot. The texture of the peas should be a little soft, like al dente pasta. Return the peas to the pot and stir in the onions, peppers and garlic until well mixed. Then add the spices, vinegar and sugar. Stir well and return it all to a boil. Simmer for 10 more minutes, stirring occasionally.
In the meantime, prepare 7 half-pint jars. According to the National Center for Home Food Preservation, sterilizing jars is NOT required IF the processing time is 10 minutes or more. Read the NCHFP fact sheet here. However, I do warm my jars before filling them to reduce the risk of cracking. You can do this in the dishwasher, but since I don’t have one here at either the old farm or the new one, I just warm the jars in the water bath pot while it is heating up.
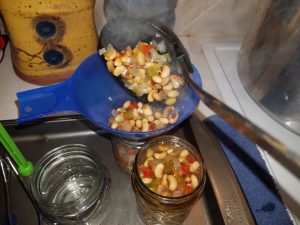
Time to fill the jars – ladle the pea mixture into each jar until it is almost full, then add hot brine from the pot until there is 1/4 inch “headspace” from the top of the contents to the top of the jar. This is not a NASCAR race, but it is important that you don’t dawdle – retaining as much heat as possible is essential to good canning. I like to work with 3 or 4 jars at a time.
Canning tip: I keep a small bowl of vinegar and a paper towel handy. After each jar is filled and the funnel removed, I dip the paper towel in the vinegar and wipe down the rim of the jar until it is squeaky clean. This helps the lids seal better.
Put a lid and ring on each jar as you finish (the lid should be “fingertip tight”), then lower the filled jars into the pot. Continue filling your jars until done. At this point the water should be pretty hot, but it is okay if it is not quite boiling yet, but don’t start the clock on the processing time until the water bath has come to a full rolling boil.
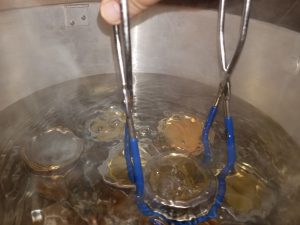
After 15 minutes in the water bath, use the jar lifter to remove the jars. I set mine on a wooden cutting board to cool, but you can also put them a a thick folded towel on the counter top.
This is the moment all canners live for – listening for the the jars to seal. I have found that I like the more expensive “brand name” lids over the discount mega-store variety because the expensive lids have a better pop, and that sweet sound is music to every canner’s ears!
Don’t forget to label your goods while you still remember what they are and when you made them. Remember that pickled goods should be stashed away for 3-6 weeks to reach full flavor.